This is it, the big v11.0 update for your CLZ Music app. Version 11 is a huge step forward in the customizability of the app. And I am not talking about tweaking the look and feel here, like layout, colors, fonts, etc… No… this time we are giving you the ability to actually customize the database itself, with your own “Custom Fields”!
The Custom Fields feature will let you create your own data fields, to catalog any information for which the app does not have a built-in field. You can create text fields, number fields, date fields, Yes/No toggles, pick list fields and much more.
All fields you create can be edited on a special Custom Fields tab of the Edit Album screen. The entered data will nicely appear in a special section on the album details page. And of course, you will be able to use the fields like any built-in fields, that is, sort on them, use pick list, date and toggle fields as folders, search your text fields, etc..
Custom Fields Overview
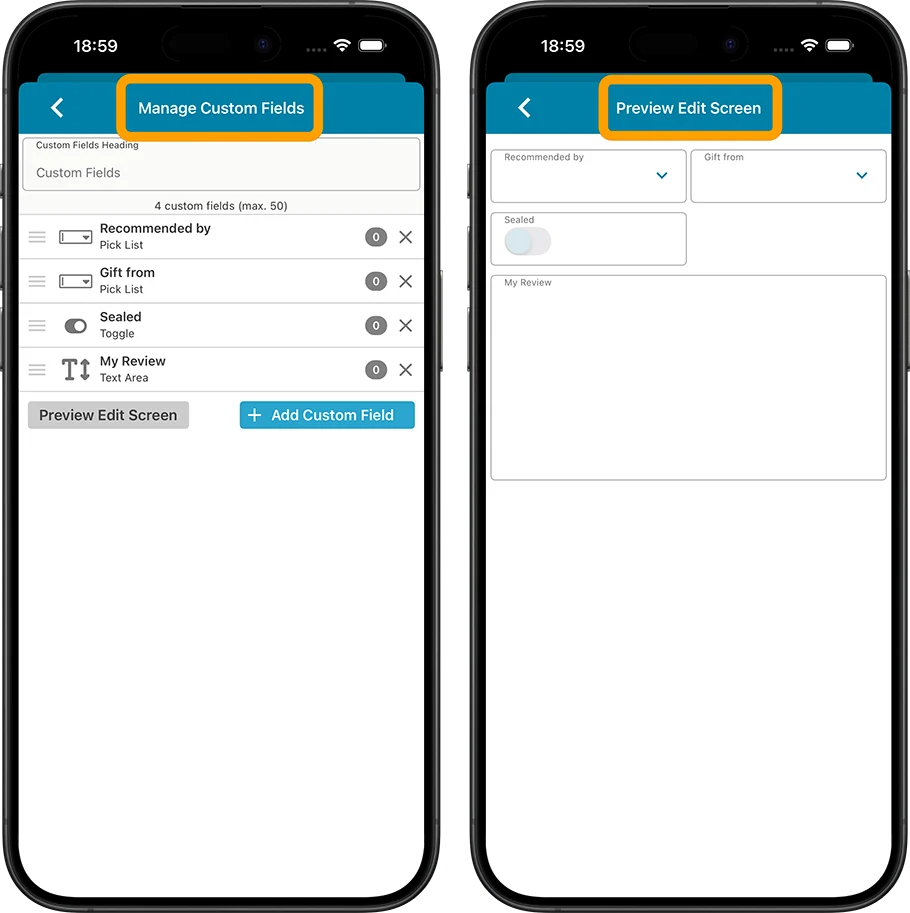
This is the “Manage Custom Fields” where you can add, remove, rename fields, showing some example custom fields, and the “Preview Edit Screen” with those fields:
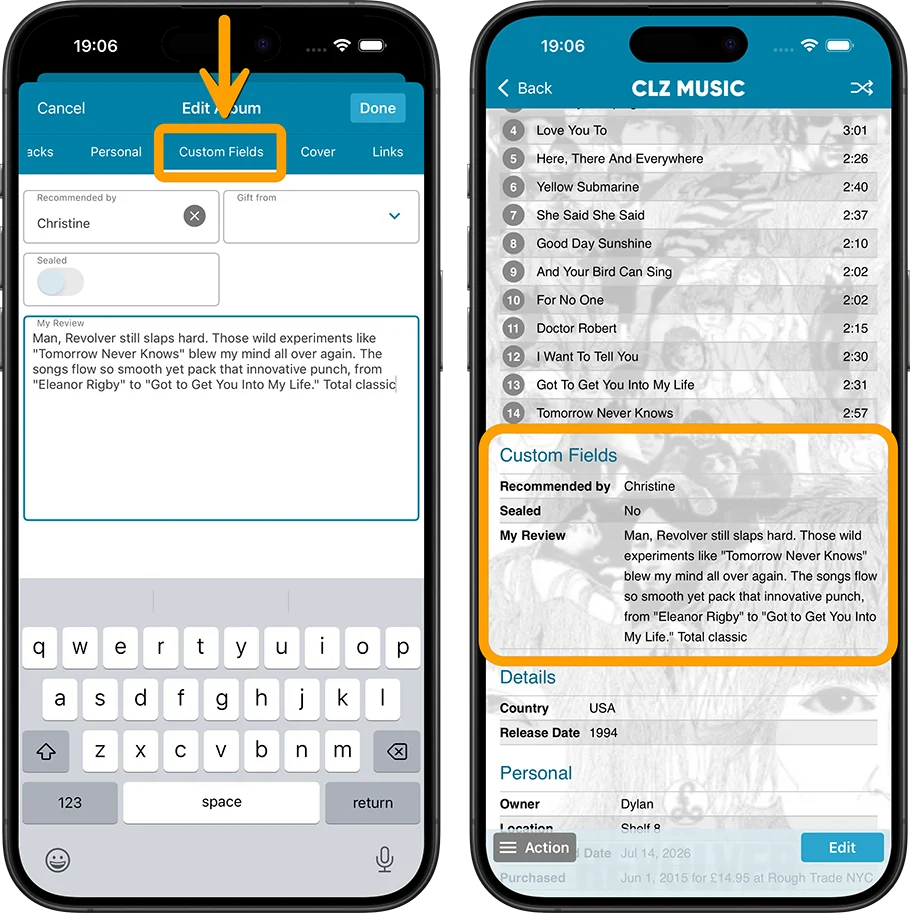
Use the special Custom Fields tab in the Edit Album screen to fill in your created fields and they will appear in the Details Panel, the area where it shows all information for one album. There is a special block with the custom data near the top, showing all your fields and their data.
Of course, you can also use the Edit Multiple screen to edit your fields in batch for many albums in one go!
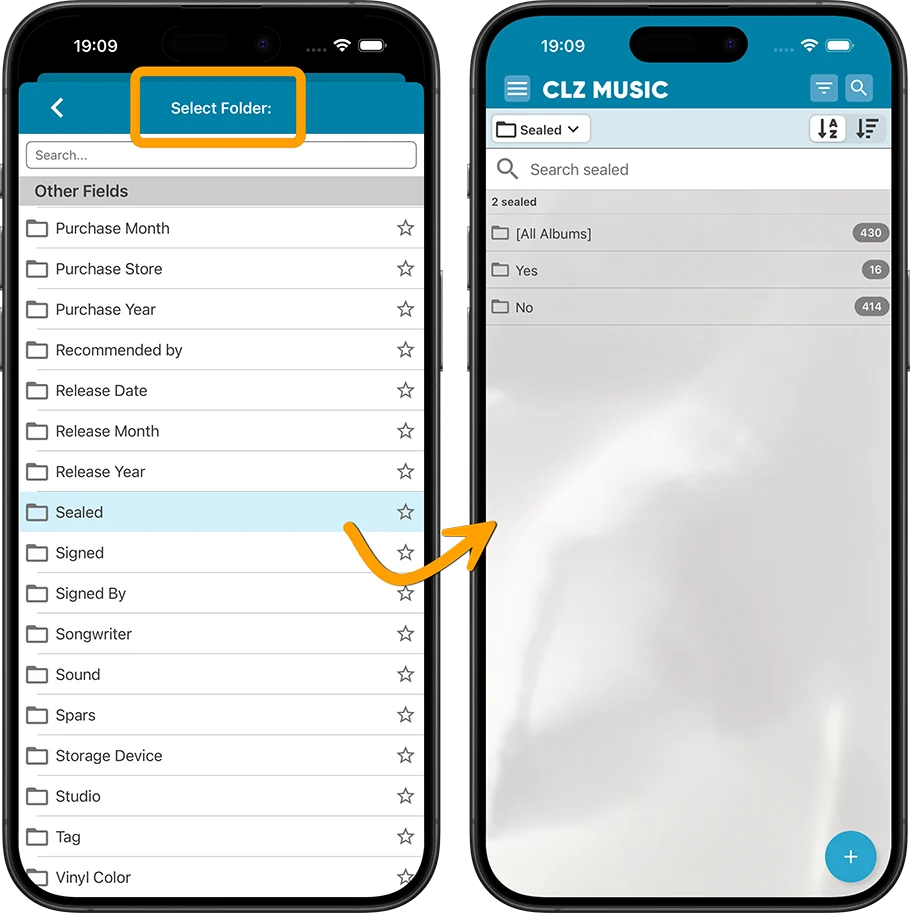
On top of that, you can use your custom pick list fields as folders in the folder panel.
Creating your own Custom Fields
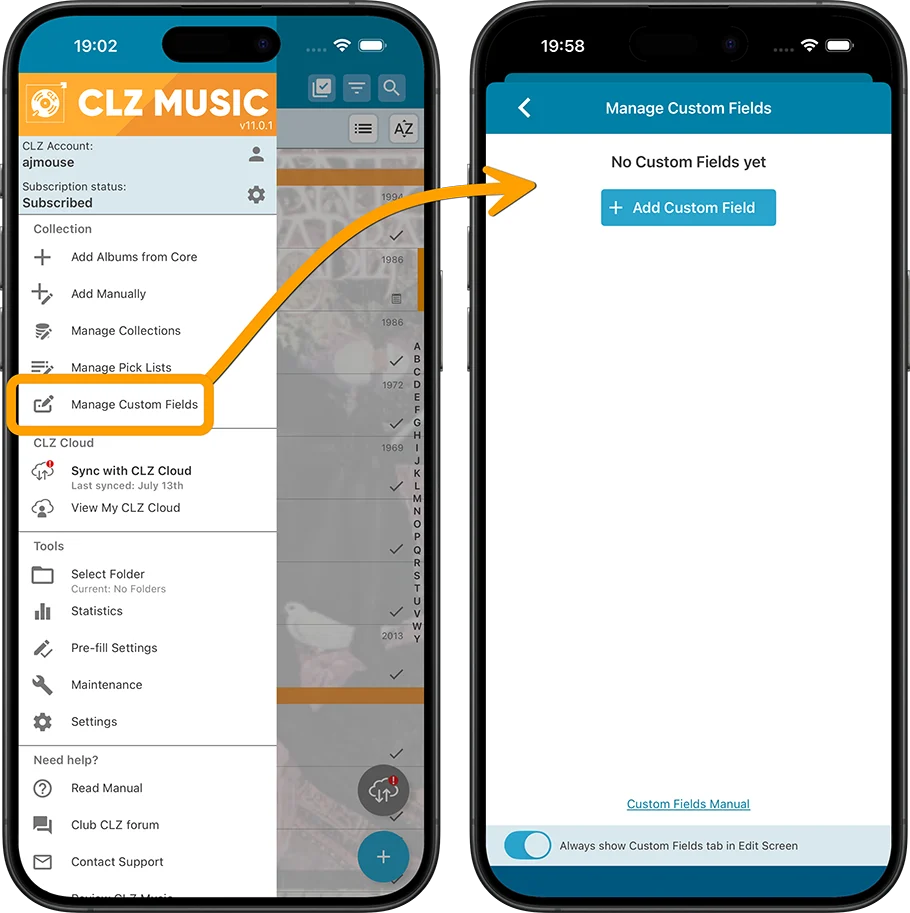
Creating your own fields is done in the Manage Custom Fields screen, which can be opened from the menu top left in your main screen. Here you add new custom fields, rename them, change their order, or remove them.
Tip: you can edit the “Custom Fields” heading at the top to your own liking, e.g. to “My Fields”. The name you choose will be used in all places where the custom fields appear.
Click the big blue “Add Custom Field” button to get started.
Check out the manual on Creating Custom Fields for more information.
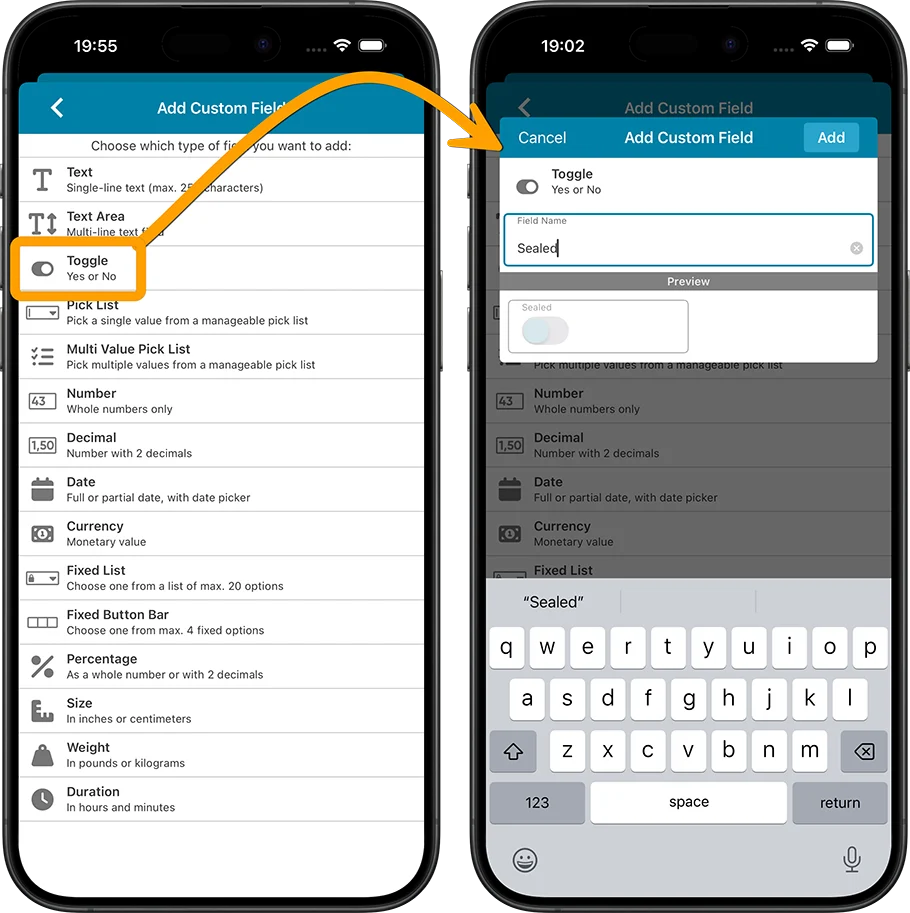
Select the Field Type:
First, you need to choose the type of field you want to add. Choose the one that best fits the type of data you want to track. Lots of options, the feature offers 15 different field types!
-
Text
Single line text field (for max. 250 characters) -
Textarea
Big text field (for lots more characters) -
Toggle
Toggle between Yes and No -
Pick List
Pick a single value from dropdown with manageable list -
Multi-Value Pick List
Checkbox multiple values from a manageable list -
Number
Whole numbers only -
Decimal
Whole number with 2 decimals -
Date
Date controller for full or partial date -
Currency
Monetary value as a whole number or with 2 decimals -
Fixed List
Choose one from a pre-defined fixed list of max. 20 options -
Fixed Button Bar
Choose one from max. 4 options -
Percentage
Percentage as a whole number or with 2 decimals -
Size
Dimensions as a whole number or with 2 decimals -
Weight
Weight as a whole number or with 2 decimals -
Duration
In hours and minutes
Check out the manual for more details on the different field types.
Set other field properties, like the Field Name
Once you have selected a Field Type, a screen will appear that lets set the Field Name and possibly several other properties, depending on the type you selected. A preview of your new field will appear at the bottom. When satisfied with your choices, click Add at the bottom right.
Managing your fields
Once you have create some fields, you can drag and drop them to change their order. The order will used in the Edit screen, and in the display area in the Details panel. You can Edit your created fields too, but only their name and possible control and display type.
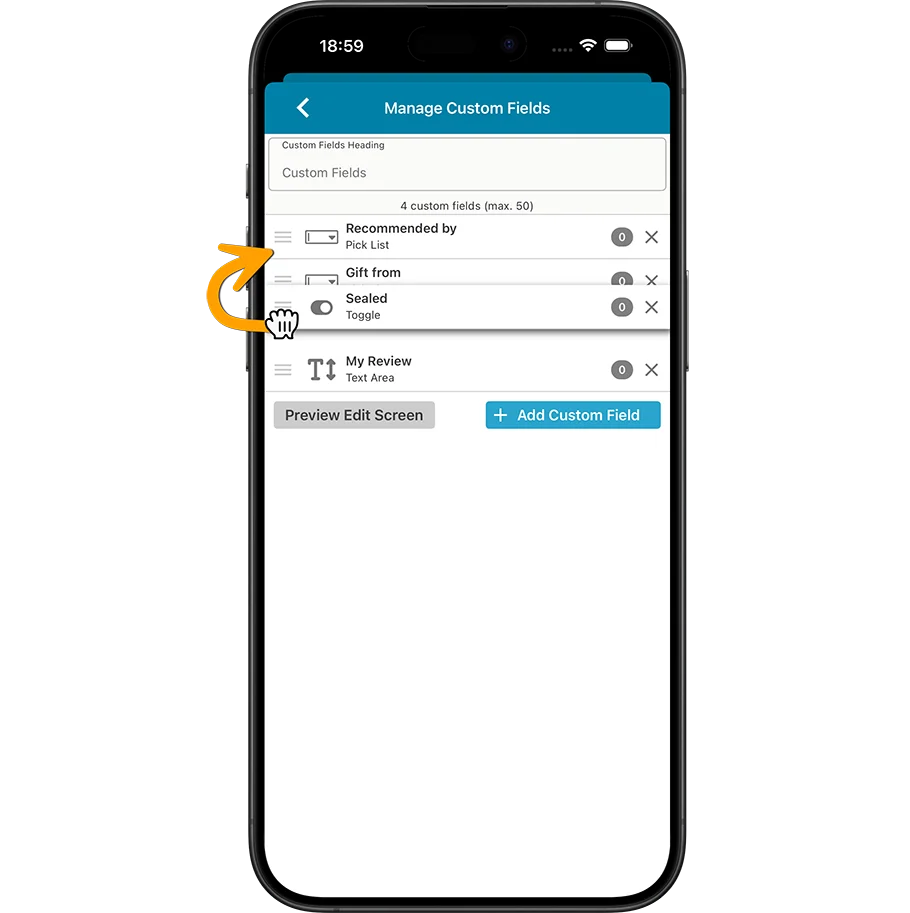
More information about Managing Custom Fields can be found in the manual.
NOTE: Once you have created a field it is not possible to change the Field Type afterwards! You will need to add a new field with the desired Type and remove the old field. If the field already had data, you can move that data from the old to the new field with the Transfer Field Data tool.
